Cuatro para Agosto! A Mexican Birthday Fiesta..

Last month, August 18th, my sisters and I, celebrated both me and my dad’s birthday. This party was also for 2 of our current babies… the two things that are keeping us busy nowadays, hence the long overdue post haha! One is The Supper Club, an events cum catering business, and the other a family business called Vmobile.

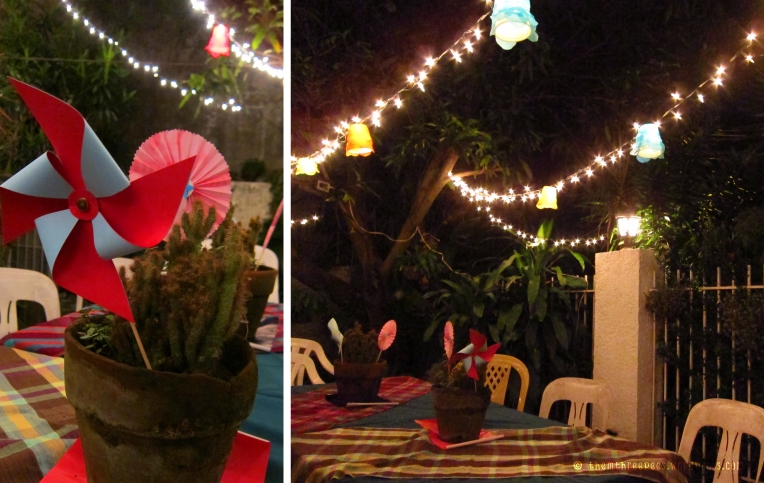
We served up a simple Mexican themed fiesta for some of our relatives and closest friends. It took about a week before the event for us to DIY our way to most of the decorations (will be posting about that soon). And all that work was well worth all the effort!

Here are are a couple of the photos we want to share with you. By the way, thanks so much to one of our lovely friends Paulo Maneja for taking these lovely shots.

Our Mexican themed spread: Calamansi Crinkles, Leche Flan / Flan, Grilled Corn, Mexican spiced chicken, Picadillo, Nachos with Pico de Gallo, Guacamole, Sour Cream and Cheese sauce, Freshly made flour tortillas
Salted Caramel Cupcakes made by very generous cousins, Ica & Kat! Love you both 😀
Cute striped straws in 3 colors! Blue, Red & Green!
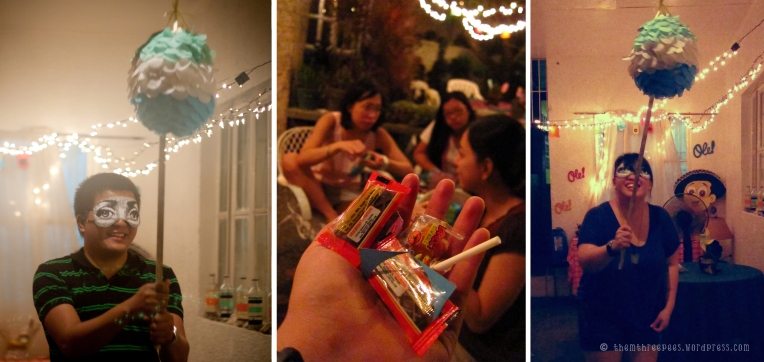
Of course! There was a piñata! :p

Some photos of our quirky friends! Thank you for making this event possible! 😀

To my fellow bees, tis the beginning of many many more parties we’ll be throwing! Salud!

Thankyouverymuch!!!

Hallo! First of all, we wanna thank you all for staying with us!

It only feels like yesterday, when my sisters and I have been throwing ideas at each other. Going on and on about starting a blog, to chronicle and share our experiences and spark creativity from amongst each other somehow. Now, here we are. We’re already on our FOURTH month and we’re quite overwhelmed with all the love we’ve been receiving from you, our dear readers and followers. *blush*blush*blush*

Why the sudden thank you’s? You might ask.. Well we’ve been blessed by lovely bloggers who have nominated us for a couple of awards.. Yes! you’ve read that right! AWARDS—-with an “S”! We know we’re quite young in the blogosphere, yet a couple of our very kind peers have considered us for these great mentions! Oh golly, enough with the gushing and rambling…. haha

Here are the 7 facts about us, the corresponding awards, together with the lovely generous people who gave these awards to us! We’ve placed the mechanics for each award as well. Again on behalf of my sisters, thank you!

7 Factoids about the Three Bees

themthreepees very own three bees, from left to right: Lyna, Middy, and Ross (Photo taken by Nicole Manalo)

Fact#1

These three bees are very close sisters with only a year apart from their ages. Middy, the eldest, followed by Ross and Lyna.

Fact#2

These three dream to travel around the world, experiencing each city, taking in their cuisine, the people, the culture.

Fact#3

Quite a talented bunch, these three have a hankering for music and are trying their hand at playing instruments… well at least trying to.

Fact#4

These three are not picky eaters, they’ll eat just about anything..

Fact#5

Some kind of “treasure hunters”, this bunch opt on purchasing stuff at thrift stores. Taking in these preloved goodies and putting a bit of a unique spin on them.

Facts #6-#7

These three have random personalities.

Middy is a braniac and a bit of a nerd, a good conversationalist–especially when the topic is about herself :P.

Ross is a hipster-who-says-she’s-not-a-hipster-geek and who’s very knowledgeable about a lot of things–most of them useless.

Lyna is a closet musician and who’s just plain awesome… yes you read that right AWESOME!  (Lyna’s presently beside me watching me like a hawk while I type this.. haha)

The Awards

Given by attitudeforgratitude  (Check her equally lovely blog! 😀 )

The Rules:

  • Link back to the blogger who nominated you.
  • Paste the award image on your blog, anywhere.
  • Tell them 7 facts about yourself.
  • Nominate 15 other blogs you like for this award.
  • Contact the bloggers that you have chosen to let them know that they have been nominated.
  • Resume blogging your regular posts.


Given by ChocChipUru (Our very generous foodie pen pal)

The Rules:

  • Thank the person awarding you
  • Share a little about why you blog and how the journey started
  • Paste the blog award on your page
  • Nominate 10 other bloggers you feel deserve the award


Given by ChocChipUru

The Rules:

  • Thank the blogger who nominated you
  • Include the links to their blogs
  • Include the award image in your post
  • Copy the award image to your site
  • Give seven random facts about yourself
  • Nominate 15 other bloggers for the award
  • When nominating other bloggers include the links to their sites
  • Let those bloggers know they’ve been nominated :)

The Nominees

Here are our ten/fifteen nominees for all three blog awards in no particular order:

  1. Pillows a-la-Mode
  2. Cats & Carnations
  3. At350degrees
  4. Needle and Fork
  5. Bake Happy
  6. A Pair and a Spare
  7. Sweetened with Honey
  8. Tulle & Trinkets
  9. The Renegade Seamstress
  10. Coffee Cup Adventures
  11. Life After Breakfast
  12. Lazy Bones Refashion
  13. Cotton & Curls
  14. Bakers Royale
  15. Sprinkle Bakes

The Perk

As a bonus and to return the favor! We want to give you a bit of goodies! 🙂

These wallpapers are illustrations of campanulas, means gratitude in the language of flowers. Just click on the color you like, and right click the image, then select “Save Image As”. Use the tile setting on your desktop.


Again our deepest deepest gratitude to you all! I pray to God to return the same blessings to you as well! 😀

Foodie Penpals

It’s that time of the month once again… no i’m not talking about my period!

­­I’m talking about the Foodie Pen Pal’s grand reveal day!! Yeah!  <fireworks. boom . boom. boom >

The Lean Green Bean

So what’s foodie pen pals you may ask? It’ s this awesome idea started by Lindsay of The Lean Green Bean where at beginning of the month you’d be paired with a food blogger or lover and  send and receive a box, parcel, package or what have you of amazing treats and yummy goodies. Then you get to bottle up all your excitement and wait till the end of the month when you can reveal what you’ve received. Exciting isn’t it?

But Lyna  it’s not the end of the month?! Well not all roses are red and the mail system is not without its delays! We had a little trouble with our mail and did not get our package in time. But all is well and we got our package in one piece! Yeah! As they say it’s better late than…to  forever wait?!  (I totally made that up)

Let’s get to it. So last month we were paired with the nicest and the sweetest girl (Uru) who literally has an equally nice and sweet blog gobakeyourself. This girl can really bake,  armed with serious baking skills she comes up with the meanest recipes that involve loads and loads of chocolates she’s not called Choc Chip Uru for nothing. But I must warn you though, visiting her site will make you gain a couple of virtual pounds and eventually WILL MAKE YOU FAT! Lol

So having said that, let’s see what she got for us.

Uru sent us quite a package, we had a little of everything from sweet, salty, spicy/chilli, savoury and chocolate-y just as we wanted!

Upon opening the box, first thing we tried were the lamington fingers, these were fluffy sponge cakes covered in chocolate and then dipped in coconut shavings! I know… yummy!

She also sent us these mini samosas, which were these little triangular tasty bombs. Eating it was literally an explosion of Indian spices in your mouth, they’re packed with so much flavour with an hint aftermath of heat! Burn! Since we love spices…she also sent us the mother of all spices…Curry Powder!

And to cap all that savory goodness who could resist a bar of Cadbury Fruit & Nut chocolate…

Thank you so much Uru for these yummy treats!

If you want to know more about Foodie Penpals or  join in the fun exchange click here.

Rainy Summer Feast!

Excuse my putting off uploading this update, I’ve been swamped not only with tons of work… I’ve been juggling both my day job and an up and coming business the sibs and I are cooking up. I think the dreary and gloomy weather is not helping at all. Back here in the Philippines it’s definitely the monsoon season.

Well, to turn this downer of a weather around.. I’m sharing 2 lovely recipes fit for a Mediterranean summer feast! 🙂

So let’s get down to the biz..

Recipe #1
Grilled Aussie Beef Strips & Vegetables
with Cucumber Yogurt Slaw


Ingredients:

For the Beef

1/2 pound Australian beef tenderloin strips

1 teaspoon thyme

1 teaspoon oregano

1-2 tablespoons soy sauce (you can use 1/4 teaspoon salt instead)

1/2 teaspoon ground black pepper (you can add more if you like it peppery)

1 tablespoon olive oil

For the Cucumber Yogurt Slaw

6 oz. plain yogurt

2 garlic cloves, crushed

2 cucumbers, peeled, seeded & grated

Salt & Pepper to taste

Directions:

1. Mix in all ingredients for your marinade (oregano, thyme, soy sauce, pepper and olive oil). Marinate your beef strips and let sit for at least 30 mins. (The more time you let it sit the better.)

2. In the meantime, prep the cucumber yogurt slaw. Using your hands, squeeze out the excess water from the cucumber shavings. (You can also use a sieve and press the water out if you like.) Now, in a bowl, mix the cucumber shavings together with all the other ingredients. Season with salt and pepper. Set aside.

3. In a griddle over medium-high heat, grill the marinated beef until cooked. Baste leftover marinade onto the meat while grilling. You can also grill some sliced up veggies like onions, tomatoes, and bell peppers.

4. Place grilled meat and veggies on a bed of green lettuce and serve with your prepped slaw.

Recipe #2
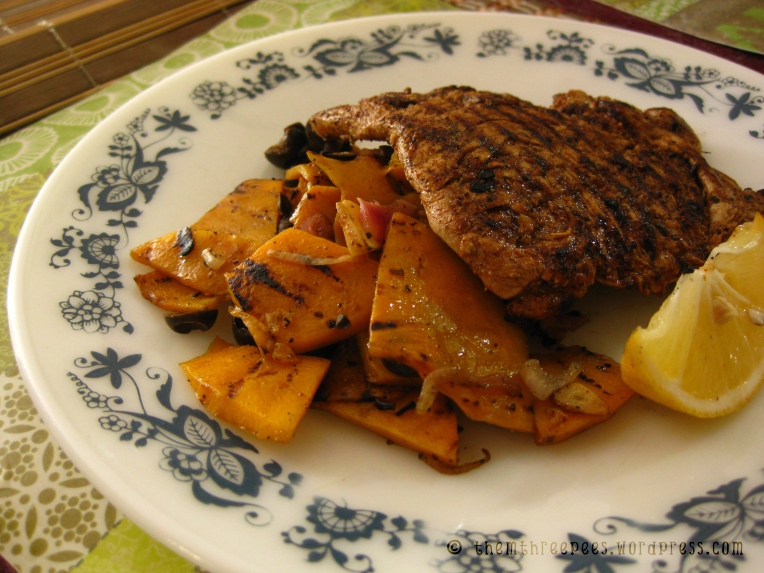
Morrocan Chicken
with Grilled Squash and Black Olives

Recipe inspired by The South Beach Diet Recipe

Ingredients:

For the Chicken

4 (6 oz.) boneless, skinless chicken breasts

1 teaspoon ground cumin

1 teaspoon ground ginger

1/2 teaspoon cinnamon

1/2 teaspoon ground black pepper

1/4 teaspoon allspice

1/4 teaspoon salt

1/8 teaspoon cayenne

1 lemon

3 teaspoons olive oil

For the Veggies

3/4 pound squash, sliced a bit thin

1 small onion

2 gloves of garlic, sliced

1/3 cup black olives, sliced

Olive oil


Directions:

1. Pound your chicken breasts between two sheets of waxed paper to about 1/4 inch thick. (This makes sure they get evenly cooked.)

2. Prep your ras al-hanut (this one’s a Moroccan spice blend.. consisting of all the the dry ingredients in our list.) Grate a bit of the zest from the lemon onto the spice mix. Squeeze in about a tablespoon of the lemon juice as well. Stir in your olive oil.

3. Now spread the wet rub onto both sides of the pounded chicken. In a griddle over medium-high heat, grill the chicken until outside’s blackened and cooked through. You can grill the squash on the same griddle as well. Set aside the cooked chicken and squash separately.

4. Now on a pan, place a bit olive oil for sautéing. Place the onions. Once the onions are a bit softened and translucent add in the garlic . Sauté some more. Toss in the grilled squash and the black olives.

5. Serve chicken together with the squash & olives with a lemon wedge.


That’s it! Go on and create your own summer feast 🙂

Can’t wait to soak my feet on the sand the next summer!

Taken from my last beach trip with a couple of friends. 🙂

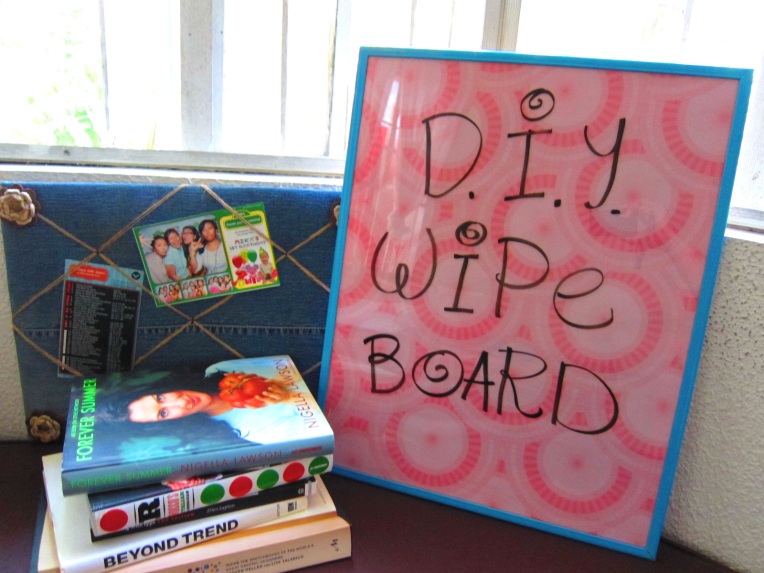
D.I.Y. Wipe Board

DIY Wipe Board

So we’ve been itching to put our hands on something productive this past few days, like a project of some sort! You know just to keep the mind from idling and keep the creative juices flowing.

Then we remember we did a renovation on one of the rooms in the house and have kept  some a lot of the stuff the we thought we could rescue, re-use, recycle, refashion and what other RE-‘s you have in mind. But it has been two years since we’ve last seen these projects-to-be (Yes we have a knack for forgetting, actually more of procrastinating). It’s all tucked in a room outside the house (like a toned down hoarders episode) away from all the clean-ness and organized loveliness where no one can see or remember it. Haha!

We didn’t want to be overwhelmed by all the things  that were waiting inside that little room, so we decided to take on an easy project.

Having said that…that’s when we found this!

Let’s do this…

Here’s what we’ll need

  • an old picture frame (ones with glass not plastic)
  • newspaper or masking tape
  • gift wrapping paper
  • scissors
  • tape
  • spray paint (optional)
  • white wipe board markers!

1. Take out the glass and the picture it came with and line the inner part of the frame with newspaper.

2. Spray paint the frame. (Remember to protect your “painting area” you don’t want to leave paint marks everywhere!)

3. Cover the picture with gift wrapping paper.

4. Once the paint dries, take the “picture + glass” and put it back on the frame (You can clean the glass from finger prints with a lightly damp newspaper before putting it back.).

Voila.. you now have your very own  wipe board!

Happy wiping/ writing! 🙂

Le “Healthy” Croque Monsieur

Father’s Day is very near indeed, so here’s a breakfast / brunch idea that you lovelies can easily whip up for the “monsieur” of the house—Croque monsieur!

I remember watching “It’s Complicated” on HBO (which stars the lovely Meryl Streep–I wish I age that beautifully ;P), where Madame Streep’s character mentioned this sandwich! I was like “croque–whut?” so I googled it and bumped into the recipe! This lovely French fastfood snack is an upscale hot ham and cheese sandwich. Traditionally, this is made with Béchamel or Mornay sauce. Since I found the sauce too rich, I decided to cut that down and just added a bit of vegetables to make it “healthier”.. 🙂

Let’s get started on this very quick recipe!

Ingredients:

• 2 slices of your preferred bread

• Ham

• Parmesan and Mozzarella Cheese, grated (if you wanna go traditional use Gruyere and Emmental)

• Butter, softened

• Romaine Lettuce

• Tomatoes

Directions:

1. Preheat your grill at 150°C or 300°F. Make the sandwich, placing the ham between the bread slices. Spread the butter onto both top and bottom sides of your sandwich.

2. On medium heat, fry your sandwich on a griddle. Flip onto the other side. Take the sandwich out of the pan once golden brown. Place the sandwich on your cookie sheet.

3. Sprinkle the top of your sandwich with cheese. Grill it in the oven until the cheese is melted.

4. Add in your lettuce and sliced tomatoes. Serve!

So there goes a delish sandwich for you guys! 🙂 Happy Father’s Day to the very handsome “monsieur” of our home! We love you dad! 🙂

Happy Father’s Day to all the dads in the world too! Bon appetit!

“Sew” Cute! Refashioning an Oversized Shirt

Halloo, dear lovelies! First of all, my apologies to you guys for this long overdue update as well as to my younger sib, Lyna, who has been constantly nagging, (oops!) lovingly reminding me (nice save! haha) to finally upload a post for this blog.

Anyway, enough with the pleasantries, let’s jump right into our latest adventure–refashioning! Yes, you read that right, REFASHIONING. We got into this hobby just recently about 2-3 months ago while Pinteresting. We stumbled upon a lovely refashionista (cottonandcurls.blogspot.com) which totally got us hooked. Inspired by her upcycles and refashions, we tried our “hand” on refashioning. (Pun intended!) Since we didn’t have a machine then, we did all of our sewing by hand. It took us around 2-3 days finishing projects. I guess seeing clothes take an exciting new form trumps the many knuckle-hurting and needle-pricking moments.

Good thing the parentals got us a pre-loved electric sewing machine in one of our family thrift shopping trips, so I got to finish this project in time for this post! :)Downside is it’s Japanese—- hehehe! Got to tinker with it so we got it to work! Yey!

Btw, before you start on recreating this project, you need to gear up with these stuff:

• button down shirt (I used an oversized long-sleeved one)

• sewing machine or needle and thread

• thread (preferably close to the color to that of your fabric)

• scissors

• flexible measuring tape (I used  a ruler.. )

• pins

• marking pen, pencil, or tailor’s chalk (any marking pen would do, just make sure that you use one that wouldn’t leave a permanent mark on your fabric especially when you’re handling delicates or light colored ones)

Optional (these are in case you want to add a tad bit more detail to your blouse)

• extra fabric with the print or color you like (you’ll use this one for lining / piping the edges of the blouse)

• colored buttons

• lace

First thing you need to do is create a pattern:

1. Lay your oversized shirt on a surface, making sure that you lay it real flat. After that, place a shirt you like the shape of, on top of the oversized shirt, again making sure it’s flat. This will serve as your pattern. Secure your “pattern” with pins.
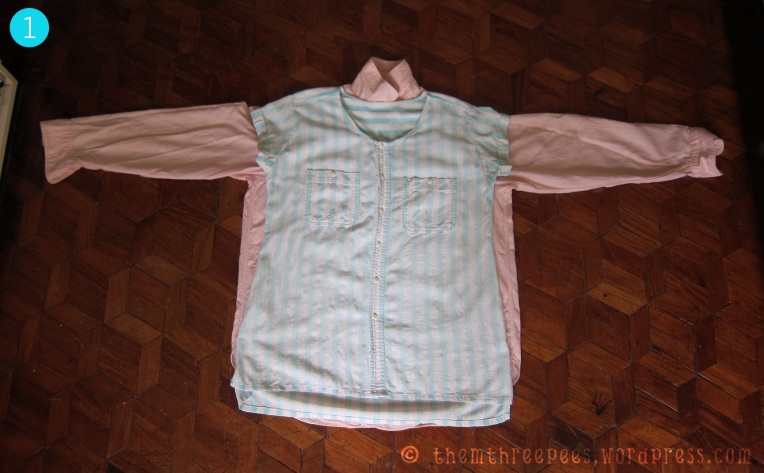
Trace

2. Getting your chalk, trace around your pattern. Spare a bit for seam allowance. (I gave mine around half an inch.)

3. Not removing the pins. Cut out the fabric following the edges of your seam allowance. Make sure you cut out a neck line as well.
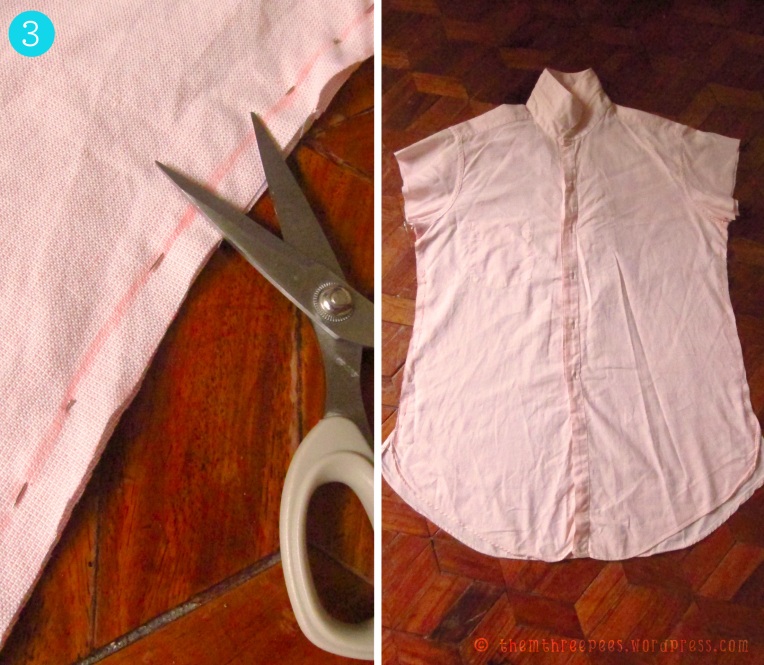
4. Rip the seams of the pocket and set aside.

Now you can begin on sewing things up:

5. Sew along the lines you traced. (Since I decided on placing a bit of piping on my shirt, I left the neckline out.) Sew the piping on the neckline. (It’ll be a breeze if you iron your piping first so the width would be consistent..)

Hang in there lovelies! We’re almost through! Remember the pocket we set aside in Step 4?

6. Taking your ripped pocket, sew in the details you want placed. (I took the same piping I used on the neckline and a bit of lace.)

7. Pin the pocket on the area where you want it sewn. (I pinned mine facing the mirror, so I can see the effect 😀 ) Sew it in place.

Optional: Sew in colorful buttons on your shirt for a cuter effect!

Voila! A new stylish shirt! 😀

Try it for yourself and show us what you come up with.. 😀

Pins-pirations

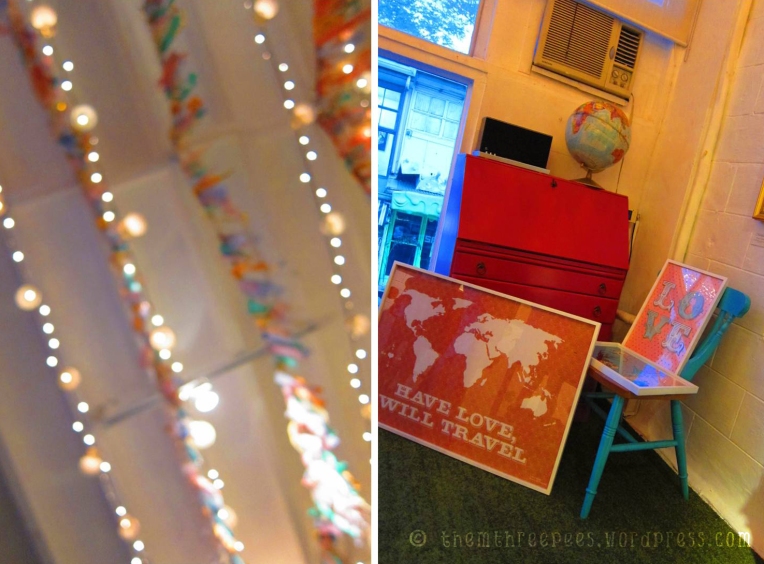
Since my sister’s and I, the entire family’s really into DIY stuffs especially those shabby-chic-pinteresty types. We’ve been on a constant look out for some inspiration…. and when we were out on one of our trips to the north one day we saw this little store (heima) and  boy what inspiration did we find!

It was like being in a coma and waking-up in pinterest heaven!

The place just lives and breathes design sponge!

They even had these– view master. Wooow! We use to own one of these when we were little talk about major nostalgia so just imagine our excitement. We were totally fighting over who gets to play with it first…childish i know..NOT 🙂

Everything was just so cute and pretty, we wanted everything in that store but the stuff were a little pricey. Good thing the owner allowed us to take all the pictures that we wanted! Now we get to share the inspiration with you, yehey! enjoy!

Heart Shaped Pancakes : )

Hey there!

Ok, so I’ve been putting off writing the first post on this blog probably because of lack of inspiration or just plain-old timidity?! Well now that the dry spell’s over allow me to officially welcome you to our blog. Hoorah! Boom. Boom. boom * fireworks*

A few months back my sister (Ross) stumbled upon this awesome easy to do Martha Stewart Heart Pancake recipe! I know right! Was already sold on the pancake part, and Martha Stewart that’s just ssssweet! I know you can’t wait coz I can’t. So let’s do this.

Here’s what you’ll need

Ingredients

  • 1 cup all-purpose flour
  • 2 tablespoons sugar
  • 2 teaspoons baking powder
  • 1/2 teaspoon salt
  • 1 large egg, lightly beaten
  • 1 cup milk
  • 2 tablespoons unsalted butter, melted and cooled slightly, plus 1 tablespoon for griddle

Directions

  1. Preheat griddle to 375 degrees, or heat griddle pan over medium-high heat. Whisk flour, sugar, baking powder, and salt in medium bowl. Add egg, milk, and 2 tablespoons melted butter; whisk to combine. Batter should have small to medium lumps.
  2.  Test griddle by sprinkling with a few drops of water. If water bounces and spatters, it is hot enough. With paper towel, brush 1/2 teaspoon butter onto griddle. Wipe off excess.
  3. Fill a pastry bag fitted with a 1/4-inch plain round tip with batter; twist end of bag, and secure with rubber band. Working in batches, pipe heart shapes, drawing V of batter in center of hearts to fill, on heated griddle. When pancakes have bubbles on top and are slightly dry around the edges, about 2 minutes, flip over. Cook until golden on the bottom, about 1 minute.
  4. Repeat with remaining batter, using 1/2 teaspoon butter on griddle for each batch, keeping finished pancakes on a heat-proof plate in the oven until ready to serve.

And since it’s mother’s day tomorrow, we’re making our first post an homage to all of our kind-loving-self-sacrificing-but-sometimes-drives-me-crazy-mothers out there. It’s great that we get to do the first post and dedicate it to all the dear mothers … especially to our very own– Mrs. B. It’s like hitting two birds with a Mother rock! Happy mother’s day!

P.S

Why not give this easy recipe a try and surprise your mom with a special breakfast in bed, tell us what you think and how it went…